How to import a GPX route into Strava
Last updated: June 4, 2026 · 7 min read

You have a GPX file (from a watch, a planner, or the Roovr app) and you want to use it as a route in Strava. Here's the full path, on desktop and on mobile.
.gpx file, name the route, and save. Then open the Strava mobile app, go to the Record screen, tap Add Route, select your route, and start.
The eight steps
-
Get your GPX file ready
Locate the
.gpxfile on your device. If you exported it from a Garmin, Suunto or Coros watch, it usually lives in a sync folder or in your Downloads. If you generated a loop in Roovr and tapped Export → Strava, the file was saved to Files → On My iPhone → Roovr on iOS, or Documents → Roovr on Android.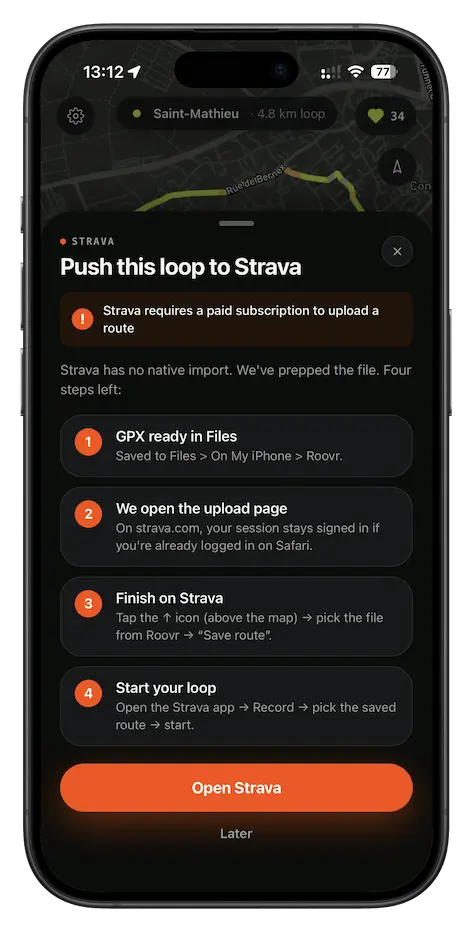 Roovr export sheet, Strava tile selected.
-
Open Strava and click "Upload"
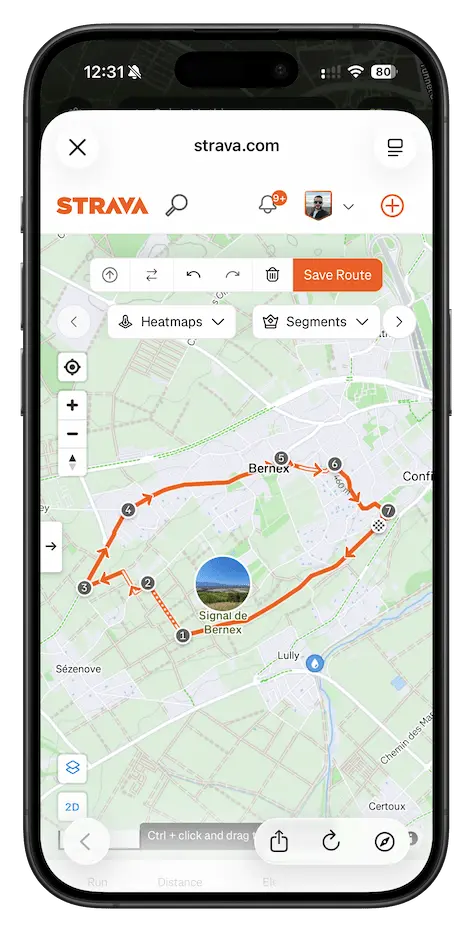
Open a regular browser (Safari, Chrome, Firefox) and go to strava.com/routes/new. Log in if you aren't already. This is the route builder, not the activity upload page. On the toolbar, find the small up-arrow icon above the map. That's the GPX upload trigger. Click it.
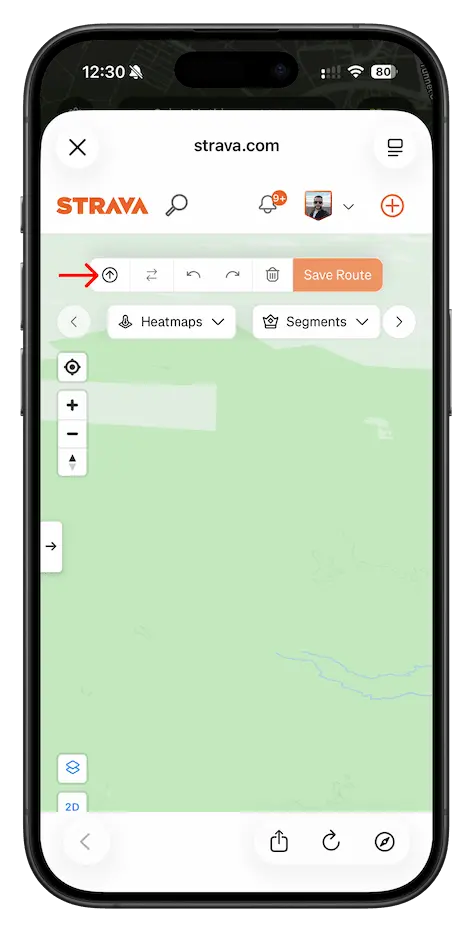 Strava route builder. Upload icon, top-left.
-
Pick your GPX file
Your device's file picker opens. Navigate to where your
.gpxlives. If you exported from Roovr, it's in the Roovr folder you opened in step 1. Otherwise check your Downloads or your watch's sync folder. Select the file.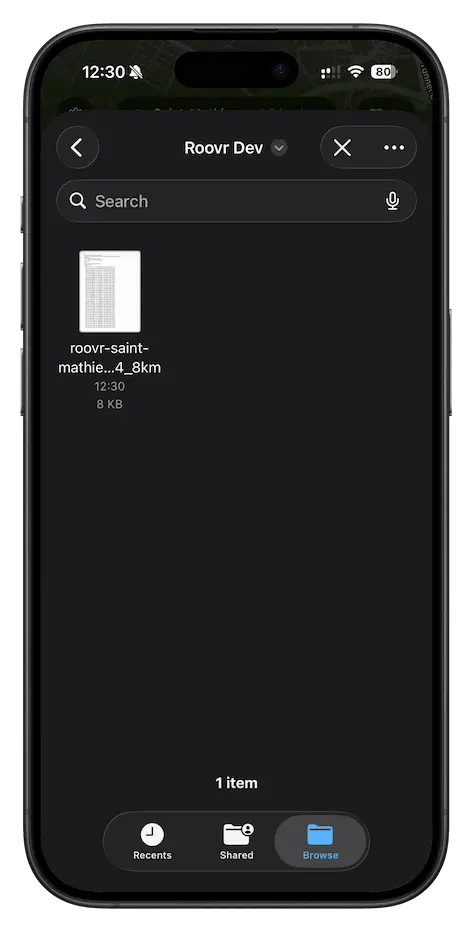 File picker, GPX selected.
-
Confirm the import
Strava parses the GPX, plots the path on the map, and pre-fills the distance and elevation. Take a quick look at the trace.
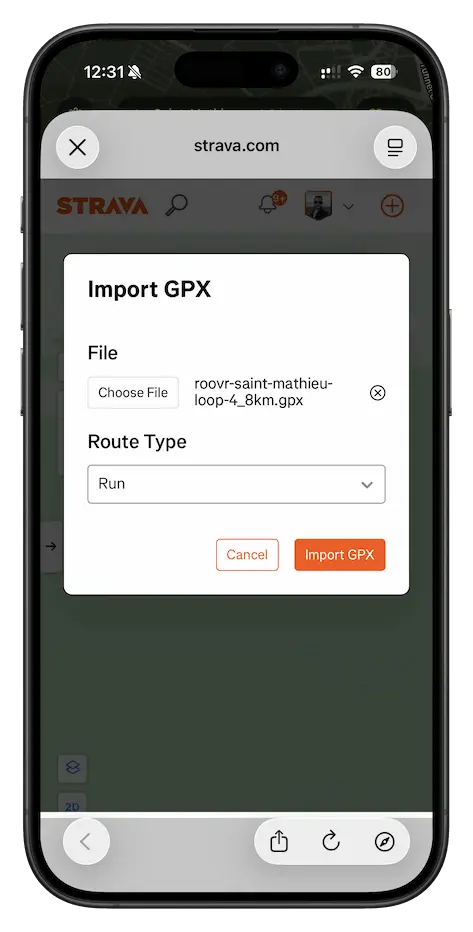 Route plotted, ready to name and save.
-
Save your route
Click Save Route. Give the route a clear name. The route is now linked to your Strava account.
 Name, sport, save. Web side done.
-
Open Strava and tap "Add Route"
Switch to your phone and open the Strava mobile app. Your saved route syncs from your account automatically within seconds. Go to the Record screen, then tap Add Route.
 Record screen, Add Route highlighted.
-
Select your route
Browse the list. Your imported route is there, identified by the name you gave it on the web. Tap it.
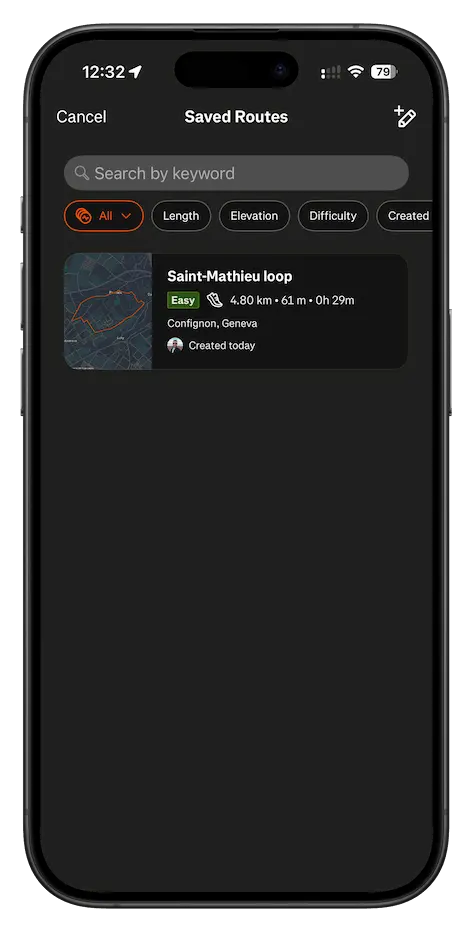 Pick the route you just imported.
-
Start the loop
Back on the Record screen, the route is now loaded. Tap the big Start button when you're ready. Strava guides you turn by turn for the whole loop.
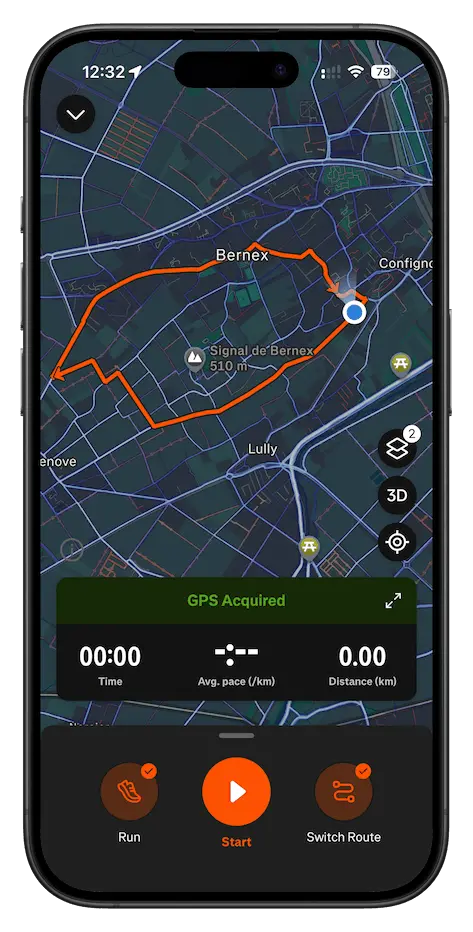 Route loaded. Start when ready.
The shortcut: generate the GPX in Roovr
If you don't have a GPX file yet, Roovr is the fastest way to get one. Pick a distance, hit Generate, and Roovr builds a loop from your location that starts and ends at the same spot. Real streets, real elevation, no manual drawing.
Tap Export → Strava in the app: the GPX is saved into your Files app (or Documents on Android), and Roovr opens the Strava route builder for you. From there, you're back at step 2 above.
Get Roovr